Whirlpool WTW4816FW2 Service Manual: Comprehensive Overview
This service manual unlocks the full potential of your Whirlpool WTW4816FW2 washer‚ offering detailed guidance for installation‚ operation‚ and troubleshooting procedures‚ starting today‚ 02/13/2026.
The Whirlpool WTW4816FW2 is a top-load washing machine designed for efficient and reliable performance in household laundry tasks. This service manual is specifically tailored for technicians and qualified personnel responsible for the maintenance‚ repair‚ and servicing of this particular model. It provides a comprehensive resource‚ detailing everything from initial setup and operational features to in-depth troubleshooting and component replacement procedures.
Understanding the WTW4816FW2’s internal workings is crucial for effective service. This manual aims to equip you with the knowledge to diagnose issues accurately and implement appropriate solutions‚ ensuring optimal washer functionality. As of today‚ 02/13/2026‚ this document serves as your primary guide to navigating the complexities of this appliance‚ allowing for swift and effective repairs‚ and ultimately‚ satisfied customers. It’s your passport to mastering the WTW4816FW2!
Safety Precautions & Warnings
Prior to any service or repair work on the Whirlpool WTW4816FW2 washing machine‚ always disconnect the appliance from both the electrical power supply and the water source. Failure to do so presents a serious risk of electric shock‚ water damage‚ or personal injury. Wear appropriate personal protective equipment (PPE)‚ including safety glasses and gloves‚ throughout the servicing process.
Be mindful of sharp edges and potential pinch points during disassembly and reassembly. Never operate the washer with any panels removed. As of today‚ 02/13/2026‚ remember that improper repairs can compromise the machine’s safety features. This manual assumes a qualified technician is performing the work. Always adhere to local electrical and plumbing codes. Ignoring these precautions could lead to severe consequences‚ voiding warranties and potentially causing harm.
Installation & Setup
Proper installation is crucial for optimal performance of your Whirlpool WTW4816FW2 washer‚ ensuring reliable operation and longevity‚ beginning on 02/13/2026.
Unpacking and Initial Inspection
Carefully unpack your new Whirlpool WTW4816FW2 washer‚ noting the date of 02/13/2026‚ and thoroughly inspect it for any signs of shipping damage before proceeding with installation. Remove all packing materials‚ including any protective films or foam inserts‚ from both the interior and exterior of the appliance.
Verify that all included accessories‚ such as the drain hose‚ inlet hoses‚ and any documentation (like the user manual and warranty information)‚ are present. Check for dents‚ scratches‚ or other cosmetic imperfections on the cabinet.
Inspect the door seal for any tears or damage. Gently rock the washer to check for any loose components. If any damage is detected‚ immediately contact the retailer or Whirlpool customer support and do not attempt to install or operate the appliance. Document any damage with photographs for claim purposes.
Water Supply Connection
Connect the hot and cold water supply hoses to the designated inlets on the back of the Whirlpool WTW4816FW2 washer‚ remembering today’s date‚ 02/13/2026. Ensure the connections are tight to prevent leaks‚ but avoid over-tightening‚ which could damage the fittings. Use new hoses for optimal performance and to avoid potential issues with older‚ worn hoses.
Verify that the water supply pressure is within the recommended range (typically 20-120 psi). Install a water hammer arrestor if your plumbing system experiences water hammer.
Before fully tightening the hoses‚ briefly open the water supply valves to flush out any debris that may be present in the lines. Check for leaks at both hose connections and at the valve itself. If leaks are detected‚ tighten the connections further or replace the hose washers.
Electrical Connection & Grounding
Connect the Whirlpool WTW4816FW2 washer to a dedicated‚ grounded 120V‚ 60Hz electrical outlet‚ remembering today is 02/13/2026. Never use an extension cord‚ as it can pose a safety hazard and may not provide sufficient power. The electrical outlet should be located within reach of the power cord length.
Proper grounding is crucial for safety. The washer’s power cord includes a grounding wire‚ which must be connected to a properly grounded outlet. Do not modify the plug in any way.
If you are unsure about the electrical installation‚ consult a qualified electrician. Verify the outlet’s voltage matches the washer’s requirements. A mismatched voltage can cause damage to the appliance. Always disconnect power before performing any service or maintenance.
Operational Features & Controls
Explore the intuitive controls of the WTW4816FW2‚ designed for effortless laundry care‚ and understand its diverse wash cycles for optimal cleaning performance‚ as of 02/13/2026.
Wash Cycle Selection Guide
Navigating the wash cycle options on your Whirlpool WTW4816FW2 is crucial for achieving the best cleaning results for various fabric types and soil levels. This guide details each cycle’s function‚ ensuring optimal garment care. The Normal cycle is ideal for everyday cottons and linens‚ providing a balanced wash. For heavily soiled items‚ utilize the Heavy Duty cycle‚ offering extended wash times and increased agitation.
Delicate fabrics benefit from the Delicates cycle‚ employing gentle washing motions. The Permanent Press cycle minimizes wrinkles in synthetic blends. A quick Quick Wash cycle is perfect for lightly soiled items needing a fast refresh. Bulky Items/Sheets accommodates larger loads like comforters. Whites cycle uses hotter water temperatures for brighter whites. Finally‚ the Rinse & Spin cycle is useful for rinsing and spinning items washed by hand or requiring extra rinsing‚ as of 02/13/2026.
Option Settings & Customization
The Whirlpool WTW4816FW2 offers a range of option settings to customize your wash cycles‚ tailoring them to specific needs. Temperature selection allows you to choose between hot‚ warm‚ and cold water‚ impacting cleaning effectiveness and fabric protection. Spin Speed options – low‚ medium‚ high‚ and no spin – control the final spin cycle intensity‚ minimizing wrinkles or maximizing water extraction.
The Soil Level setting adjusts wash time and agitation based on soil intensity – light‚ normal‚ and heavy. Extra Rinse ensures thorough detergent removal‚ ideal for sensitive skin. Delay Start lets you schedule washes for convenient times‚ as of 02/13/2026. Control Lock disables the control panel to prevent accidental changes. Utilizing these options allows for a truly personalized laundry experience‚ optimizing both cleaning performance and garment care.

Troubleshooting Common Issues
This section provides systematic diagnostics for resolving frequent problems with your WTW4816FW2 washer‚ as of today‚ 02/13/2026‚ ensuring optimal performance and longevity.
Washer Won’t Start – Diagnosis
Initial checks are crucial when the WTW4816FW2 fails to start. Verify the power cord is securely plugged into a functioning outlet – test the outlet with another device. Confirm the lid switch is engaging correctly; a faulty switch prevents operation as a safety measure.
Next‚ inspect the control panel for any illuminated error codes‚ referencing the dedicated error code section for specific meanings. If no codes appear‚ proceed to check the thermal fuse‚ located near the motor‚ for continuity using a multimeter; A blown fuse indicates an overheating issue.
Also‚ examine the motor windings for shorts or opens. A defective motor is a common cause of a no-start condition. Finally‚ assess the control board for any visible damage or burnt components; a malfunctioning control board can disrupt the entire starting sequence. Remember today’s date: 02/13/2026‚ for record-keeping.
Leaking Water – Identifying the Source
Water leaks in the WTW4816FW2 require systematic diagnosis. Begin by inspecting the water inlet hoses and connections for tightness and cracks; replace any damaged hoses immediately. Check the drain hose connection to the standpipe and the pump outlet for secure fitting and signs of wear.
Next‚ examine the tub seal and the inner/outer tub for cracks or damage. Leaks from these areas often require tub replacement. Inspect the water level pressure switch and its hose for leaks or blockages. A faulty switch can cause overfilling and subsequent leakage.
Don’t overlook the detergent dispenser; clogs can cause overflow. Finally‚ verify the pump housing isn’t cracked. Remember to document the date‚ 02/13/2026‚ when addressing the leak for future reference and service history tracking.
Error Codes & Their Meanings (WTW4816FW2 Specific)
The WTW4816FW2 utilizes specific error codes to pinpoint malfunctions. Code “F01” indicates a water inlet valve issue – check for obstructions or valve failure. “F02” signals a drain pump problem; inspect for blockages or pump motor defects. A “F03” error suggests a temperature sensor malfunction‚ requiring sensor testing and potential replacement.
“F04” points to a lid switch failure‚ preventing operation for safety. “F05” indicates an over-sudsing condition‚ advising reduced detergent use. “F06” signifies an imbalance issue during spin‚ requiring load redistribution. “F07” relates to a control board communication error‚ potentially needing board replacement.
Remember to note the date‚ 02/13/2026‚ when encountering these codes for accurate service records. Always consult the full service manual for detailed diagnostic steps and component testing procedures before replacing parts.

Disassembly & Component Access
Detailed instructions guide safe disassembly‚ enabling access to internal components like the control panel‚ top panel‚ motor‚ and pump for effective service‚ as of 02/13/2026.
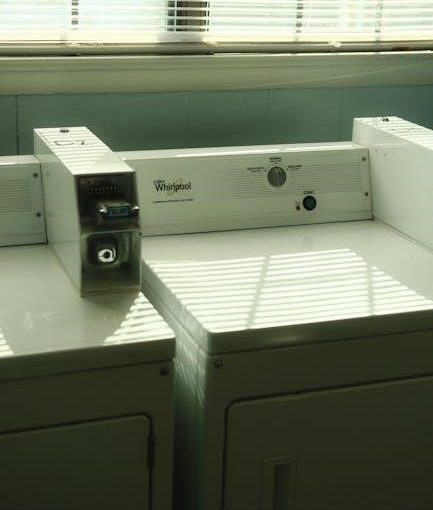
Accessing the Control Panel
To access the control panel on the Whirlpool WTW4816FW2 washer‚ begin by disconnecting the appliance from the power source – safety first! Locate and remove the two screws securing the control panel to the washer’s chassis; these are typically found on the underside of the panel. Gently lift the control panel upwards‚ being mindful of the ribbon cables connecting it to the main control board.
These ribbon cables are delicate‚ so use a small‚ flat-head screwdriver to carefully disengage the locking tabs before disconnecting them. Once disconnected‚ the control panel can be fully removed‚ providing access for inspection‚ testing‚ or replacement. Remember to document the cable connections before disconnecting to ensure proper reassembly. Refer to diagrams within this service manual for visual guidance‚ dated 02/13/2026‚ for a streamlined process.
Removing the Top Panel
Removing the top panel of the Whirlpool WTW4816FW2 washer requires a systematic approach. First‚ disconnect the washer from the power supply for safety. Locate the retaining screws at the rear of the washer‚ typically two or three in number‚ securing the top panel. Remove these screws and gently slide the top panel backwards‚ releasing it from the mounting clips along the sides.
Exercise caution as the top panel may be slightly heavier than anticipated. Be mindful of any wiring harnesses connected to the control panel or other components underneath. Disconnect these connectors carefully‚ noting their positions for reassembly. This access allows for inspection and service of internal components. Consult the service manual diagrams‚ updated 02/13/2026‚ for precise screw locations and connector details.

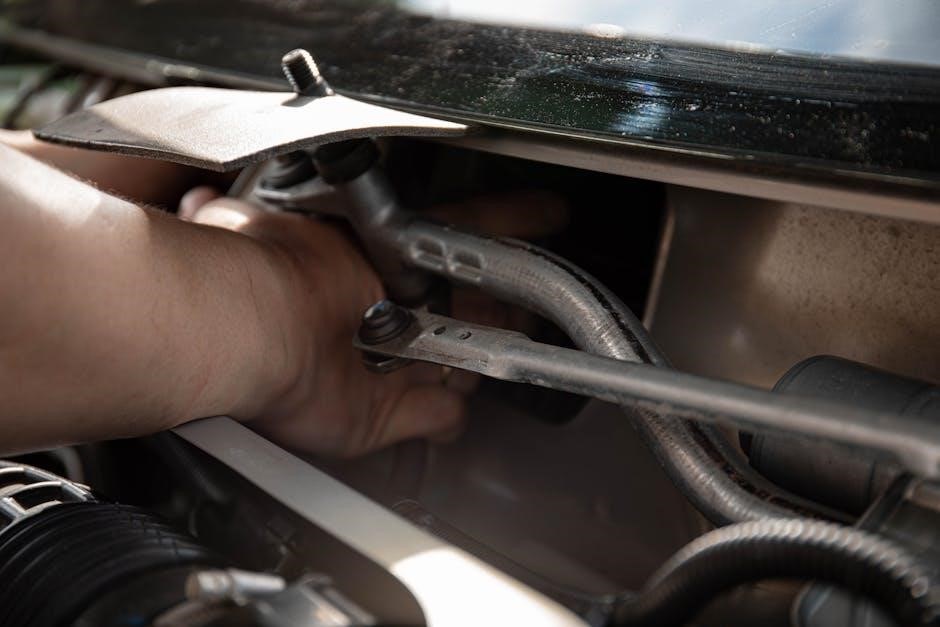
Motor & Pump Access Procedures
Accessing the motor and pump on the Whirlpool WTW4816FW2 typically involves removing the front panel and potentially the inner cabinet. Begin by disconnecting power. After removing the top panel (refer to dedicated instructions)‚ detach the front panel by releasing the retaining clips or screws. The inner cabinet may require further screw removal to gain sufficient access.
Locate the motor and pump assembly at the base of the washer. Disconnect any wiring connectors and hose clamps attached to these components. Support the pump during removal‚ as residual water may be present. Detailed diagrams‚ current as of 02/13/2026‚ within the service manual illustrate the exact component locations and connection points. Always consult the manual before proceeding with disassembly.

Component Testing & Replacement
This section details procedures for verifying functionality and safely replacing key parts within the WTW4816FW2‚ as of 02/13/2026‚ ensuring optimal performance.
Testing the Water Inlet Valve
Diagnosing a faulty water inlet valve is crucial for resolving filling issues in the WTW4816FW2 washer. Begin by disconnecting power and accessing the valve‚ typically located at the rear of the appliance. Visually inspect for any physical damage or obstructions.
Using a multimeter‚ check the valve’s coil resistance; a reading outside the specified range (refer to the service manual’s electrical specifications‚ dated 02/13/2026) indicates a faulty coil.
Next‚ carefully apply voltage (matching the valve’s rating) to the valve’s terminals. You should hear a distinct clicking sound as the valve opens. If no click is heard‚ or if the valve remains closed‚ replacement is necessary. Ensure proper grounding during testing. Always verify water supply pressure before concluding a valve failure;
Testing the Drain Pump
Effective drain pump testing is vital for addressing water removal problems in the Whirlpool WTW4816FW2. First‚ disconnect power to the washer and locate the drain pump – usually accessible from the front or rear panel. Inspect the pump for any obstructions like lint or small objects‚ dated 02/13/2026.
With the pump disconnected‚ use a multimeter to check the coil resistance. Compare the reading to the specifications detailed in the service manual; deviations suggest a faulty coil.
Apply voltage directly to the pump terminals (matching its rating). The pump should operate‚ creating a noticeable flow. If it doesn’t‚ or if it operates erratically‚ replacement is required. Always check for voltage at the pump connector during operation to rule out wiring issues.
Control Board Diagnostics & Replacement
Diagnosing the control board (ECU) on the Whirlpool WTW4816FW2 requires a systematic approach‚ referencing the service manual’s schematics‚ as of 02/13/2026. Begin by visually inspecting for burnt components or damaged traces. Utilize a multimeter to check for proper voltage distribution to various components.
Access the diagnostic mode (procedure outlined in the manual) to observe error codes and actuator responses. If the board fails self-tests‚ or exhibits erratic behavior‚ replacement is likely necessary. Before replacement‚ verify all wiring connections and sensors are functioning correctly.
When installing a new control board‚ ensure it’s the correct replacement part. Transfer any necessary jumpers or connectors‚ and follow the manual’s programming instructions if applicable.