Honeywell TH8110U1003 Vision Pro 8000 Digital Thermostat: A Comprehensive Guide
This guide provides detailed information regarding the Honeywell TH8110U1003, sourced from manualsbase, offering a comprehensive resource for users and installers alike, dated August 20, 2020․
The Honeywell TH8110U1003 Vision Pro 8000 is a fully featured, programmable digital thermostat designed for optimal home comfort and energy savings․ As detailed in manuals sourced from manualsbase (added August 20, 2020), this thermostat offers a user-friendly interface and advanced control over your HVAC system․
It’s part of a collection of Honeywell manuals, identified as manuals_honeywell, and is presented in English․ The Vision Pro 8000 goes beyond basic temperature control, providing features like customizable scheduling, smart response technology, and filter change reminders․ This guide, based on available documentation, will walk you through installation, programming, and troubleshooting to ensure you maximize the benefits of your thermostat․ With a file size of 1․8M (manualsbase-id-585754), it’s a robust system for modern homes․
Key Features and Benefits
The Honeywell TH8110U1003 Vision Pro 8000, documented in manuals available on manualsbase (added August 20, 2020, identifier manualsbase-id-585754), boasts several key features․ These include a large, easy-to-read touchscreen display, 7-day programmable scheduling, and compatibility with various HVAC systems․
Benefits extend to significant energy savings through optimized temperature control and reduced waste․ Smart Response technology learns your heating and cooling patterns for faster comfort․ Filter change reminders, a crucial maintenance feature, ensure optimal system performance․ The thermostat’s intuitive interface, detailed in the English language manuals, simplifies programming and operation․ This model, part of the Honeywell manuals collection, offers a balance of advanced functionality and user-friendliness, making it a valuable addition to any home․

Understanding the Thermostat Interface
The Vision Pro 8000’s interface, detailed in manualsbase documentation (August 20, 2020), features a touchscreen and intuitive menus for easy operation and control․
Display Icons and Their Meanings
The Honeywell Vision Pro 8000 utilizes a variety of display icons to communicate system status and operational modes․ Understanding these icons, as outlined in the manualsbase documentation (added August 20, 2020), is crucial for effective thermostat management․ A flame icon indicates active heating, while a snowflake signifies cooling is engaged․ A fan icon displays the fan’s operational state – auto or on․
Battery icons signal low battery levels, prompting replacement․ Wi-Fi icons show connection status, indicating successful or failed network connectivity․ Icons also represent system modes like ‘Hold’, ‘Vacation’, and ‘Schedule’․ A filter icon illuminates when a filter change is due, promoting optimal air quality․ The ‘Smart Response’ icon confirms this feature is active, learning your heating and cooling preferences․ Refer to the manual for a complete list and detailed explanations of each icon’s specific meaning․
Navigating the Menu System
The Honeywell Vision Pro 8000’s menu system, detailed in manualsbase resources (dated August 20, 2020), is accessed via the thermostat’s touchscreen interface․ The ‘Menu’ button initiates access to settings, scheduling, and system information․ Utilize the up and down arrow buttons to scroll through menu options, and the ‘Select’ button to confirm choices․
Within the menu, users can adjust temperature settings, program schedules, configure advanced features, and view system diagnostics․ Submenus are logically organized, allowing for intuitive navigation․ The ‘Back’ button returns to the previous screen․ Remember to save any changes made to prevent loss of settings․ Familiarizing yourself with the menu structure, as described in the manual, ensures efficient control over your home’s climate and maximizes the thermostat’s functionality․

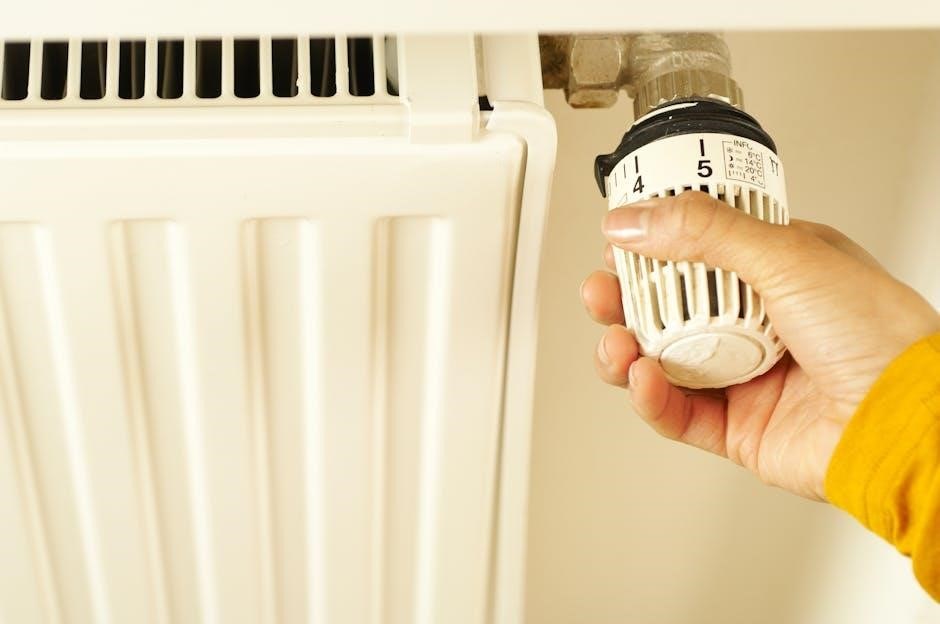
Installation and Wiring
Proper installation, guided by manualsbase documentation (August 20, 2020), requires careful wiring and compatibility checks with your existing HVAC system for optimal performance․
Compatibility with HVAC Systems
The Honeywell TH8110U1003 Vision Pro 8000 thermostat, as detailed in manualsbase resources dated August 20, 2020, exhibits broad compatibility, yet careful verification is crucial before installation․ It generally supports 24VAC heating and cooling systems, encompassing conventional gas, oil, and electric furnaces, alongside central air conditioning units․
However, compatibility nuances exist; Systems employing line voltage (120V/240V) heating – such as electric baseboard heaters – are not directly supported and require an interface adapter․ Similarly, compatibility with certain proprietary or communicating HVAC systems may be limited; consulting the system manufacturer is recommended․
The thermostat supports multi-stage heating and cooling, heat pumps (with and without auxiliary heat), and systems with a common wire (C-wire)․ A C-wire is often required for consistent power; if absent, a C-wire adapter may be necessary․ Always refer to the detailed compatibility charts within the official Honeywell manual for precise system requirements․
Step-by-Step Wiring Instructions

Prior to wiring the Honeywell TH8110U1003 (referenced in manualsbase documentation from August 20, 2020), always disconnect power at the breaker․ Identify existing wire labels – typically R, W, Y, G, and C․ Use the provided wiring diagram; it’s crucial for correct connections․
Connect each wire to the corresponding terminal on the thermostat baseplate․ Securely tighten screws, ensuring a firm connection․ The ‘C’ wire (common wire) is vital for consistent power․ If your system lacks a C-wire, a compatible adapter is required․
Double-check all connections against the diagram before proceeding․ Incorrect wiring can damage the thermostat or HVAC system․ After wiring, carefully mount the thermostat baseplate to the wall, then snap the thermostat display unit onto the base․
Mounting the Thermostat Base
Following the wiring steps (as detailed in manualsbase resources dated August 20, 2020), carefully position the thermostat baseplate on the wall where the old thermostat was located․ Use the provided mounting screws and wall anchors if necessary, ensuring a secure fit․
A level is recommended to guarantee the baseplate is perfectly horizontal for aesthetic appeal and proper display alignment․ Gently push the wires back into the wall cavity, avoiding any pinching or strain․
Once the baseplate is securely mounted, snap the main thermostat unit onto the base․ Ensure it clicks firmly into place․ Verify the unit is stable and doesn’t wobble․ This completes the physical installation process, preparing for programming․

Programming and Scheduling
The Vision Pro 8000, detailed in manualsbase documentation from August 20, 2020, allows customized temperature settings via intuitive scheduling options for optimal comfort․
Setting the Date and Time
Accurate date and time settings are crucial for proper scheduling functionality on your Honeywell TH8110U1003 Vision Pro 8000 thermostat․ Referencing manualsbase documentation (added August 20, 2020), begin by accessing the thermostat’s menu system․ Navigate to the “Settings” or “Configuration” section – the exact wording may vary slightly․
Within this menu, locate the “Date” and “Time” options․ Use the up and down arrow buttons to adjust the month, day, and year․ Similarly, adjust the hour and minute to reflect the current time․ Ensure you correctly set the AM/PM indicator․
Confirm your selections by pressing the “Save” or “Done” button․ The thermostat will then utilize this information for all scheduled programming and time-based features, ensuring consistent and reliable operation․ Incorrect settings will impact schedule accuracy․
Creating and Editing Schedules
The Honeywell TH8110U1003 Vision Pro 8000, as detailed in manualsbase resources (dated August 20, 2020), allows for customized heating and cooling schedules․ Access the “Schedule” or “Programming” section within the menu․ You can typically create separate schedules for weekdays and weekends, or even individual days․
To create a new schedule, define “periods” – typically Wake, Leave, Return, and Sleep․ For each period, set the desired temperature and the time it begins․ Editing existing schedules is equally straightforward; select the period you wish to modify and adjust the time or temperature accordingly․
Remember to save your changes after each adjustment․ The thermostat’s programming capabilities offer significant energy savings by automatically adjusting temperatures based on your lifestyle and preferences․
Temporary and Permanent Holds
The Honeywell TH8110U1003 Vision Pro 8000, documented in manualsbase (August 20, 2020), offers both temporary and permanent hold features for overriding programmed schedules․ A “Temporary Hold” maintains a selected temperature until the next scheduled period begins, reverting automatically․ This is ideal for short-term adjustments․
To activate a temporary hold, simply adjust the temperature manually and confirm the hold duration․ A “Permanent Hold,” conversely, maintains the set temperature indefinitely, disregarding the programmed schedule until manually cancelled․ Access this option through the thermostat’s menu system․
Cancelling a permanent hold restores the original programmed schedule․ Understanding these hold functions allows for flexible temperature control, balancing comfort with energy efficiency, as outlined in the available manuals․
Advanced Features and Settings
The Vision Pro 8000, detailed in manualsbase (August 20, 2020), boasts Smart Response, filter reminders, and vacation mode for optimized comfort and efficiency․
Smart Response Technology
Honeywell’s Smart Response technology, documented within the TH8110U1003 manual available on manualsbase (added August 20, 2020), is a key feature designed to enhance comfort and energy efficiency․ Unlike traditional thermostats that cycle on and off based solely on temperature, Smart Response learns the thermal characteristics of your home․
This learning process allows the thermostat to anticipate temperature changes and proactively adjust the heating or cooling system․ It effectively minimizes temperature swings, delivering a more consistent and comfortable environment․ The system analyzes how quickly your home heats up or cools down, factoring in elements like insulation, window efficiency, and external weather conditions․
By understanding these dynamics, Smart Response can initiate heating or cooling before the setpoint is reached, ensuring the desired temperature is achieved precisely when needed․ This proactive approach not only improves comfort but also reduces energy waste by preventing the system from overworking to catch up on temperature fluctuations․ It’s a sophisticated system detailed in the referenced manual․
Filter Change Reminders
The Honeywell TH8110U1003 Vision Pro 8000, as detailed in the manualsbase documentation (added August 20, 2020), incorporates a helpful filter change reminder system․ Maintaining a clean air filter is crucial for optimal HVAC system performance and indoor air quality․ This feature proactively alerts you when it’s time to replace your filter, preventing reduced airflow and potential system strain․
Users can customize the reminder settings within the thermostat’s menu․ You can set the reminder based on a specific time interval (e․g․, every 30, 60, or 90 days) or total run time of the system․ The thermostat will then display a visual notification on the screen when the set interval is reached․
Ignoring filter change reminders can lead to decreased efficiency, higher energy bills, and even system failures․ The manual emphasizes the importance of regularly checking and replacing the filter, and this feature simplifies that process, ensuring your HVAC system operates at peak performance․
Vacation Mode Configuration
The Honeywell TH8110U1003 Vision Pro 8000, documented on manualsbase (added August 20, 2020), features a convenient Vacation Mode designed to save energy while you’re away․ This mode allows you to set a lower (or higher, depending on the season) temperature that will be maintained during your absence, reducing energy consumption without risking damage to your home’s plumbing or HVAC system․
To activate Vacation Mode, navigate to the settings menu on the thermostat․ You’ll be prompted to enter the duration of your trip and the desired temperature․ The thermostat will automatically revert to your regular schedule upon your return, or when the specified duration expires․
The manual highlights that Vacation Mode is ideal for extended absences, offering significant energy savings․ It’s a simple yet effective way to manage your home’s climate and reduce utility bills while enjoying your time away․

Troubleshooting Common Issues
Manualsbase documentation (August 20, 2020) details solutions for power failures, inaccurate readings, and connectivity problems with the Honeywell TH8110U1003 thermostat․
Thermostat Not Powering On
If your Honeywell TH8110U1003 Vision Pro 8000 thermostat fails to power on, several factors, as outlined in manualsbase documentation (added August 20, 2020), should be investigated․ First, verify the circuit breaker controlling the HVAC system is not tripped․ A blown fuse within the HVAC unit itself is another potential cause and requires inspection․
Next, carefully examine the thermostat wiring, ensuring all connections are secure and correctly placed according to the wiring diagram․ Loose wires are a frequent culprit․ Confirm the ‘C’ wire (common wire) is properly connected, as this is essential for providing continuous power․ If a ‘C’ wire isn’t present, a ‘C’ wire adapter may be necessary․

Finally, check the thermostat batteries (if applicable, some models have battery backup)․ Replace them with fresh batteries․ If the issue persists after these checks, consult a qualified HVAC technician for further assistance․
Incorrect Temperature Readings
If the Honeywell TH8110U1003 Vision Pro 8000 displays inaccurate temperature readings, several troubleshooting steps, detailed in manualsbase resources (dated August 20, 2020), can be taken․ Ensure the thermostat isn’t directly exposed to sunlight, drafts, or heat sources like lamps, as these can significantly affect readings․ Verify the thermostat is level; an unlevel installation can cause inaccuracies․
Check for obstructions blocking airflow around the thermostat․ Dust accumulation inside the unit can also contribute to errors; gently clean the exterior with a soft cloth․ The thermostat’s location is crucial – avoid areas near exterior walls or doors․
Calibrate the temperature reading within the thermostat’s settings menu if a consistent offset exists․ If problems continue, a faulty temperature sensor may require professional replacement by an HVAC technician․
Connectivity Problems (if applicable)
The Honeywell TH8110U1003 Vision Pro 8000, as detailed in manualsbase documentation (added August 20, 2020), may offer connectivity features depending on the specific model․ If experiencing connectivity issues – such as failing to connect to a home network or remote access problems – first verify your Wi-Fi network is functioning correctly․
Ensure the thermostat is within range of your router and that the correct network password has been entered․ Restart both the thermostat and your router․ Check for firmware updates within the thermostat’s settings; outdated firmware can cause connectivity conflicts․
If issues persist, consult the Honeywell support website or contact a qualified HVAC technician for assistance․ Interference from other wireless devices can also disrupt connectivity․