
Article Plan: Recipe Instruction
Recipe instruction encompasses crafting clear, concise guides for culinary creations. This involves detailed ingredient lists, organized equipment sections, and sequentially ordered, easily understood preparation steps.
Effective recipe writing also considers audience needs and utilizes visual aids for enhanced comprehension, ensuring successful cooking experiences.
Recipe writing is a unique form of technical communication, blending precision with creativity. It’s more than simply listing ingredients; it’s about guiding someone – perhaps a novice cook or a seasoned chef – to recreate a dish successfully. The core of effective recipe writing lies in clarity and accuracy, ensuring the final result mirrors the intended flavor and texture.
Historically, recipes were often passed down orally or through handwritten notes, relying on assumed knowledge. However, modern recipe writing demands a standardized approach. This involves a structured format, including a title, introduction, ingredient list, equipment list, and, crucially, step-by-step instructions. The goal is to eliminate ambiguity and empower cooks of all skill levels.
As highlighted in instructional materials, teaching students to write recipes fosters critical thinking and organizational skills. It requires breaking down a complex process into manageable steps and communicating them effectively. Furthermore, the ability to test and revise recipes – a vital part of the process – reinforces the importance of attention to detail and problem-solving. From shortbread to Greek salad, a well-written recipe unlocks culinary success.
The Importance of Clear Instructions
Clear instructions are paramount in recipe writing, serving as the bridge between the creator’s vision and the cook’s execution. Ambiguity can lead to frustration, wasted ingredients, and ultimately, a failed dish. Precise language eliminates guesswork, ensuring consistent results regardless of the cook’s experience level.
The foundation of clarity rests on using imperative sentences – direct commands that tell the cook what to do. For example, “Preheat oven to 350°F” is far more effective than “The oven should be preheated.” Avoiding vague terms like “a pinch” or “some” and opting for specific measurements is equally crucial. As noted in recipe guidelines, spelling out measurements reinforces accuracy.
Furthermore, sequencing words like “first,” “next,” and “then” establish a logical flow, guiding the cook through each step. A disorganized or incomplete set of instructions can be overwhelming, particularly for beginners. A well-structured recipe, with clear and concise directions, empowers cooks to confidently tackle new culinary challenges, transforming a potentially daunting task into an enjoyable experience.
Understanding Your Audience

Knowing your audience is fundamental to effective recipe writing. A recipe geared towards experienced chefs will differ significantly from one intended for novice cooks. Consider their assumed knowledge of culinary techniques and terminology. A beginner-friendly recipe requires more detailed explanations of basic skills, while an advanced recipe can assume a certain level of proficiency.
Think about dietary restrictions and preferences. Is the recipe vegan, gluten-free, or designed for specific allergies? Clearly stating this information upfront is essential. Furthermore, consider the cook’s available time and resources. A quick weeknight meal recipe should be streamlined and utilize readily available ingredients, unlike a complex weekend project.
Engaging students through cooking lessons, as suggested, highlights the importance of tailoring instructions to their learning level. A worksheet guiding recipe composition emphasizes pre-planning, including considering the target audience. Ultimately, anticipating your reader’s needs and adjusting your writing style accordingly ensures they can successfully recreate your dish and enjoy the process.
The recipe title should be descriptive and enticing, immediately conveying the dish’s essence. Think beyond simply listing ingredients; aim for a title that sparks interest and accurately reflects the flavor profile. For example, “Spicy Mango Salsa” is more appealing than “Mango and Pepper Mix.”
Following the title, a concise introduction sets the stage. This is your opportunity to briefly describe the dish, its origins (if known), or what makes it special. A compelling introduction can elevate the entire recipe experience. Mentioning Karina, described as beautiful and full of life, illustrates how a personal touch can add appeal.
Crucially, the introduction should precede the ingredient list, as outlined in recipe writing guides. It’s also the place to state the serving size and yield – how many people the recipe feeds and the total quantity produced. This upfront information helps cooks plan accordingly and avoid surprises. A well-crafted title and introduction are the first steps in guiding your audience towards a successful culinary outcome.
Serving Size and Yield
Clearly stating serving size and yield is paramount in recipe writing. This information allows cooks to accurately scale the recipe to meet their needs, preventing insufficient portions or excessive leftovers. Serving size refers to the amount intended for one person, while yield indicates the total amount the recipe produces.
For instance, a recipe might state “Serves: 4” and “Yield: 6 cups.” This means the recipe is designed to feed four people, and the total output will be six cups of the finished dish. Be specific – avoid vague terms like “makes a batch;” Instead, use quantifiable measurements like “yields 12 cookies” or “makes approximately 8 servings.”
Consider the context of the dish. Is it a side dish, a main course, or a dessert? This influences appropriate serving sizes. Providing both serving size and yield offers a complete picture, empowering cooks to adjust quantities as needed. As recipe guides emphasize, this information belongs before the ingredient list, setting expectations from the outset.
Ingredients List: Formatting
A well-formatted ingredients list is crucial for recipe clarity. Begin by listing ingredients in a logical order, generally following the order they are used in the preparation process. This aids cooks in efficient workflow and minimizes confusion. Each ingredient should be on a separate line, making it easy to scan and locate.
Measurements should precede the ingredient name, using consistent units (e.g., cups, tablespoons, grams). Spell out measurements whenever possible for enhanced readability – avoid abbreviations like “tsp.” or “tbsp.” Use bolding or italics to distinguish the quantity from the ingredient itself. For example: 1 cup all-purpose flour.
Group similar ingredients together. For example, list all spices consecutively. Include any necessary preparation notes directly after the ingredient (e.g., “1 onion, chopped”). A clean, organized list, as recipe guidelines suggest, streamlines the cooking process and reduces errors. Proper formatting demonstrates respect for the cook’s time and effort.
Ingredients List: Order of Use
Strategic ordering of ingredients significantly impacts a recipe’s usability. The principle is simple: list ingredients in the sequence they are incorporated into the recipe. This mirrors the cooking process, allowing cooks to gather and prepare items as needed, minimizing mid-recipe scrambling.
Begin with ingredients used in the initial stages – marinades, dry rubs, or components of a sauce. Follow with items needed for the main preparation, such as vegetables for sautéing or proteins for searing. Finally, list ingredients added towards the end, like seasonings, garnishes, or finishing touches.
Consider sub-groupings within this order. For instance, if a recipe calls for both chopped onions and minced garlic in the same step, list the onions first, followed by the garlic. This reflects a natural progression. As the document highlights, listing in order of use is a key guideline. This thoughtful arrangement transforms a recipe from a list of items into a seamless cooking experience.
Precise Measurements & Units
Accuracy in measurements is paramount in recipe writing. Ambiguous quantities – “a pinch of salt,” “some flour” – lead to inconsistent results. Instead, utilize specific measurements like teaspoons, tablespoons, cups, grams, or ounces. Always spell out measurements fully; avoid abbreviations like “tsp” or “tbsp” unless consistently used throughout the recipe and defined initially.
Standardized units are crucial. While some cooks may be comfortable converting between cups and grams, others aren’t. Choose one system and stick to it. For dry ingredients, weight measurements (grams or ounces) are generally more accurate than volume measurements (cups), as packing density can vary.
Be consistent with your approach. If a recipe uses cups for liquids and grams for solids, clearly indicate this. The document emphasizes spelling out measurements, reinforcing the need for clarity. Precise measurements empower cooks to replicate the recipe successfully, fostering confidence and enjoyment in the kitchen.
Ingredient Specificity (e.g., type of flour)
Beyond simply listing ingredients, a well-written recipe details which type of ingredient to use. “Flour,” for example, is insufficient. Specify “all-purpose flour,” “bread flour,” “cake flour,” or “whole wheat flour,” as each yields vastly different results. The same applies to other ingredients – “sugar” could be granulated, brown, powdered, or caster sugar, each impacting texture and flavor.
Similarly, be specific about fats. “Oil” could be vegetable, olive, coconut, or avocado oil, each with a unique profile. For dairy, indicate “unsalted butter,” “heavy cream,” or “whole milk.” When using extracts, specify “vanilla extract” versus “vanilla essence.”
This level of detail prevents substitutions that might ruin the recipe. A recipe relying on the structure of bread flour won’t work with cake flour. Providing precise ingredient specifications demonstrates respect for the cook and increases the likelihood of a successful outcome. It eliminates guesswork and ensures consistent results.
Equipment List: Essential Tools
A comprehensive equipment list is crucial for recipe success. Before diving into instructions, clearly outline all necessary tools. This prevents mid-recipe scrambling and ensures cooks are prepared. Begin with fundamental items: mixing bowls (specify sizes if relevant), measuring cups and spoons (both dry and liquid), and a whisk.
Next, list specialized tools. Does the recipe require a stand mixer, hand mixer, food processor, or blender? Include baking pans (cake, loaf, muffin tin), cookware (saucepan, skillet), and utensils like spatulas, wooden spoons, and ladles. Don’t forget seemingly minor items like a vegetable peeler, grater, or zester if needed.
Specify any unique equipment. A candy thermometer is essential for caramel making, while a rolling pin is vital for pastry. Listing equipment upfront allows cooks to assess if they have everything before starting, preventing frustration and ensuring a smoother cooking experience. It demonstrates thoroughness and consideration for the user.
Equipment List: Organization
Organizing your equipment list enhances recipe clarity and user experience. Present items logically, grouping similar tools together. For example, list all measuring tools consecutively – measuring cups, spoons, and scales. Follow this with mixing equipment: bowls, whisks, mixers. Then, move onto cookware – pots, pans, baking dishes.
Consider the order of use within the recipe. If a stand mixer is used first, list it at the beginning. This anticipates the cook’s needs. Use bullet points or numbered lists for easy scanning. Bold key items or those less commonly found in kitchens.
Avoid overwhelming the reader with excessive detail. Focus on essential tools; optional items can be noted as “helpful” or “recommended.” A well-organized list isn’t just about completeness; it’s about usability. It allows cooks to quickly gather everything needed, streamlining the preparation process and fostering confidence. A clear layout minimizes confusion and promotes a positive cooking experience.
Step-by-Step Instructions: The Core
Step-by-step instructions form the heart of any recipe. Each instruction should represent a single, discrete action. Break down complex processes into smaller, manageable steps. Begin each step with a strong action verb – “mix,” “bake,” “chop,” “simmer.” This promotes clarity and directs the cook precisely.
Employ sequencing words like “first,” “next,” “then,” and “finally” to establish a logical flow. Avoid ambiguity by being specific. Instead of “add flour,” write “gradually add 1 cup of all-purpose flour.” Assume minimal cooking knowledge; don’t skip seemingly obvious details.
Maintain a consistent tone and use the imperative mood – direct commands are most effective. Test your instructions thoroughly to identify potential pitfalls or unclear phrasing. A well-written step-by-step guide empowers cooks of all levels to achieve successful results, transforming a recipe from a concept into a delicious reality.
Imperative Mood in Instructions
The imperative mood is paramount in recipe writing. It directly addresses the cook, issuing clear commands. Instead of stating “You should mix the ingredients,” simply write “Mix the ingredients.” This concise style eliminates unnecessary words and focuses on the action required. Using “add,” “stir,” “bake,” and “simmer” creates a sense of direct guidance, streamlining the cooking process.
This directness isn’t rude; it’s efficient. Cooks aren’t seeking suggestions, they need instructions. The imperative mood fosters a confident and straightforward tone, minimizing confusion. Avoid phrasing like “it is recommended to…” or “one might consider…” These weaken the instruction and introduce doubt.

Consistent use of the imperative mood throughout the recipe creates a unified and professional feel. It’s a cornerstone of effective recipe communication, ensuring the cook understands precisely what to do at each stage. This clarity is crucial for recipe success and user satisfaction.
Action Verbs and Clarity
Action verbs are the engine of clear recipe instructions. Choosing precise verbs dramatically improves understanding and minimizes ambiguity. Instead of vague terms like “combine,” opt for specific actions like “whisk,” “fold,” “sauté,” or “knead;” These verbs paint a clearer picture of the desired technique.
Strong action verbs also contribute to the imperative mood, reinforcing direct instruction. For example, “chop the onions finely” is far more effective than “the onions should be chopped.” Avoid passive voice constructions (“the mixture is stirred”) as they lack the directness needed for successful cooking.
Consider the nuance of each verb. “Simmer” implies gentle heat, while “boil” suggests vigorous bubbling. Selecting the most accurate verb ensures the cook applies the correct technique. A well-chosen verb can prevent errors and improve the final result. Prioritize verbs that are commonly understood in a culinary context, avoiding jargon where possible.
Sequencing Words (First, Next, Then)
Sequencing words are crucial for guiding cooks through a recipe’s steps in the correct order. Terms like “first,” “next,” “then,” “afterward,” and “finally” establish a logical flow, preventing confusion and ensuring successful outcomes. These words act as signposts, clearly indicating the progression of tasks.
Employing numbered lists alongside sequencing words further enhances clarity. While sequencing words provide a general order, numbers offer a definitive structure. For complex recipes with multiple sub-steps, consider using bullet points within numbered steps for added detail.
Avoid ambiguity by ensuring each step logically follows the previous one. Don’t assume the cook understands implied connections. Explicitly state each action and its timing. For instance, instead of “add the flour after mixing,” write “first, mix the wet ingredients, then gradually add the flour.”

Consistent use of sequencing words throughout the recipe maintains a cohesive and easy-to-follow structure, ultimately boosting the cook’s confidence and the recipe’s reliability.
Avoiding Ambiguity
Ambiguity in recipes leads to frustration and inconsistent results. Precise language is paramount; avoid vague terms like “a pinch” or “some.” Instead, specify exact measurements – “¼ teaspoon” or “2 tablespoons.” Similarly, replace “cook until done” with concrete indicators like “bake for 20-25 minutes, or until golden brown.”
Pronoun clarity is essential. Instead of “add it,” specify what “it” refers to – “add the sugar.” Avoid assuming the cook knows which ingredient or step you’re referencing. Every instruction should be self-contained and unambiguous.
Consider potential interpretations. A phrase like “cream the butter and sugar” could mean different things to different cooks. Clarify the desired texture – “cream together until light and fluffy.”
Recipe testing is vital for identifying ambiguous instructions. Have others follow your recipe and note any points of confusion. Addressing these ambiguities ensures a clear, reliable, and enjoyable cooking experience for everyone.

Time and Temperature Guidelines
Precise time and temperature are critical for recipe success. Specify oven temperatures using Fahrenheit and Celsius for broader accessibility. Don’t simply state “bake until done”; provide a time range – “bake for 30-35 minutes” – and visual cues, like “until golden brown and a toothpick inserted into the center comes out clean.”
Clearly indicate whether temperatures refer to oven preheating or internal food temperature. For meat recipes, internal temperature is crucial for safety and quality. Use specific terms like “bring to a simmer,” not just “cook.”
Consider altitude adjustments. Baking times and temperatures often need modification at higher altitudes. Include a note advising cooks to research appropriate adjustments if necessary.
Be mindful of resting times. Many recipes require resting periods for flavors to meld or textures to set. Include these times in the overall preparation schedule. Accurate time and temperature guidance transforms a recipe from guesswork to a guaranteed outcome.
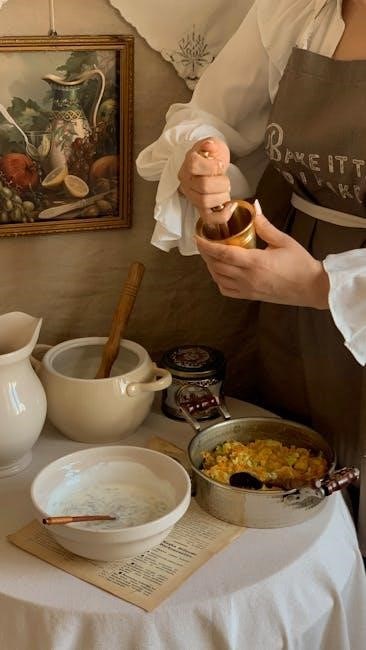
Visual Aids: Photos & Videos
Integrating visual aids – photos and videos – dramatically enhances recipe clarity and engagement. A high-quality photo of the finished dish inspires cooks and sets realistic expectations. Step-by-step photos illustrating key techniques, like kneading dough or folding ingredients, are invaluable, especially for beginners.
Short videos demonstrating complex procedures are even more effective. These can showcase proper knife skills, emulsification techniques, or the correct consistency of a batter. Videos allow cooks to see what they should be aiming for.
Ensure visuals are well-lit, in focus, and accurately represent the recipe’s outcome. Consider including photos of ingredient preparation – chopped vegetables, measured spices – to further aid understanding.
Visuals aren’t just for instruction; they also add aesthetic appeal. A beautifully presented recipe is more inviting and encourages cooks to try it. They bridge the gap between written instructions and practical application, fostering confidence and success.
Troubleshooting Common Issues
Anticipating potential problems is crucial for a user-friendly recipe. Include a “Troubleshooting” section addressing common pitfalls. For example, if a cake often sinks, explain possible causes like overmixing or inaccurate oven temperature. If a sauce separates, suggest remedies like whisking in a little flour or butter.
Address ingredient substitutions cautiously. While some are acceptable, clearly state potential impacts on the final result. Explain how to adjust cooking times or techniques if using different equipment.
Consider variations in altitude and humidity, which can affect baking. Offer guidance for cooks in different climates. Acknowledge that cooking is not always precise and encourage experimentation within reasonable bounds.
Present solutions in a clear, concise manner. Avoid technical jargon and focus on practical fixes. A well-equipped troubleshooting section transforms a potentially frustrating experience into a learning opportunity, building cook’s confidence.
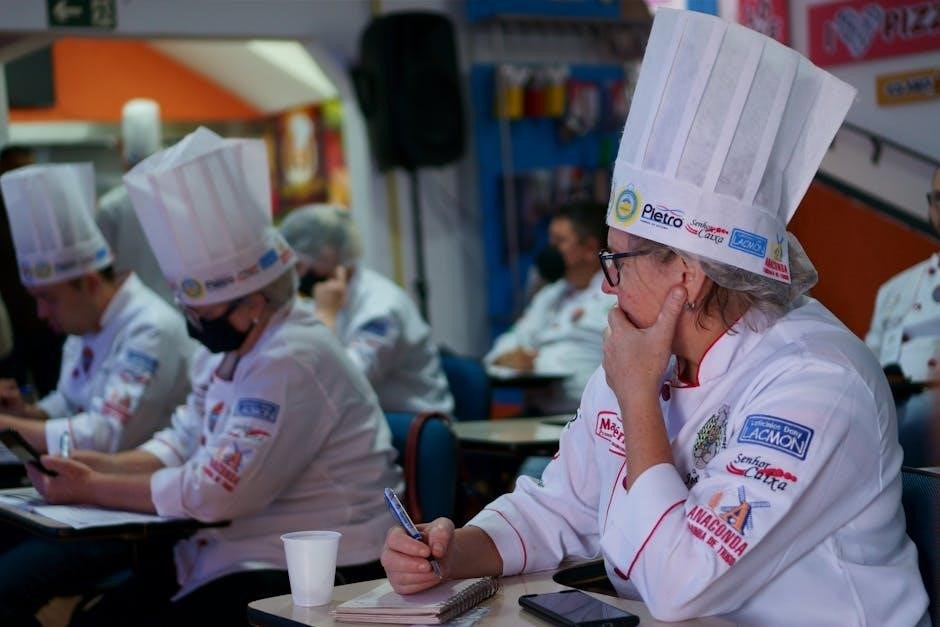
Recipe Testing and Revision
Rigorous testing is paramount before sharing any recipe. Prepare the dish exactly as written, noting every step and observation. Document any ambiguities, inconsistencies, or unexpected results. Don’t just test once; repeat the process multiple times to ensure reliability.
Invite unbiased testers – individuals with varying cooking skills – to provide feedback. Their perspectives can reveal issues you might have overlooked. Ask specific questions about clarity, ease of execution, and the final outcome.
Revise the recipe based on testing results and feedback. Refine ingredient measurements, clarify instructions, and address any identified problems. Be prepared to iterate through multiple revisions until the recipe consistently produces the desired result.
Consider different equipment variations during testing. A recipe should work across a range of ovens and cookware. Thorough testing builds trust and ensures a positive cooking experience for everyone.
Recipe Card Design & Layout
Effective recipe card design prioritizes readability and functionality. A clean, uncluttered layout is essential. Utilize clear headings for each section – Title, Ingredients, Instructions – and employ sufficient white space to prevent visual fatigue.
Font choice matters; opt for a legible typeface in a reasonable size. Consider using bolding or different font weights to highlight key information, such as ingredient quantities or crucial steps. A logical flow is vital; present information in the order a cook will need it.
Printable templates offer a convenient starting point, but customization is encouraged. Include space for notes or modifications. Consider adding a small photograph of the finished dish for visual appeal and inspiration.
Organize ingredients logically, perhaps grouping them by preparation stage. Numbered instructions are preferable to lengthy paragraphs. A well-designed card transforms cooking from a chore into an enjoyable experience.
Printable Recipe Card Templates
Printable recipe card templates streamline recipe organization and offer a personalized touch. Numerous free and premium options are available online, catering to diverse aesthetic preferences and functional needs. These templates typically include designated spaces for recipe titles, ingredient lists, preparation instructions, cooking times, and serving sizes.
Many templates feature pre-designed layouts, while others offer customizable fields, allowing users to adjust fonts, colors, and even add personal branding elements. Some templates are designed for standard card sizes (3×5 or 4×6 inches), ensuring compatibility with recipe boxes.
Choosing the right template depends on individual requirements. Minimalist designs prioritize clarity, while more elaborate templates incorporate decorative borders or illustrations. Consider templates with sections for notes, source information, or even a star rating system.
Utilizing these templates promotes consistency and makes it easier to share recipes with friends and family. They transform handwritten notes into polished, presentable culinary keepsakes.
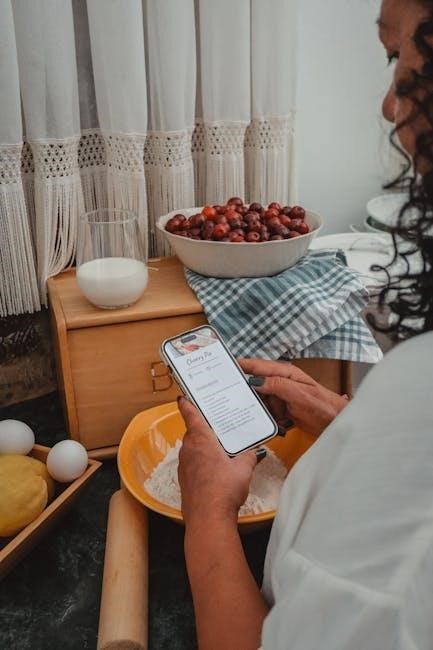
Organizing Recipes: Physical & Digital
Effective recipe organization is crucial for any home cook. Traditionally, physical recipe boxes or binders were the standard, utilizing index cards or printed recipes. Categorization by cuisine, course, or ingredient is common, enhanced by dividers and a clear labeling system.
However, the digital age offers powerful alternatives. Recipe management software and apps allow for searchable databases, ingredient scaling, and meal planning integration. Cloud storage ensures accessibility across devices and prevents data loss.
Hybrid approaches are also popular, combining the tactile satisfaction of physical cards with the convenience of digital backups. Scanning handwritten recipes preserves family heirlooms while making them searchable.
Regardless of the method, consistency is key. Develop a standardized format for recording recipes, including source information and any personal modifications. Regularly review and declutter your collection, removing duplicates or rarely used recipes. A well-organized recipe system saves time, reduces stress, and inspires culinary creativity.
Sharing Recipes with Others
Sharing recipes fosters community and preserves culinary traditions. Before distributing, ensure clarity and accuracy – a tested recipe yields better results and builds trust. Consider your audience’s skill level; adjust complexity accordingly, offering helpful notes for beginners.
Digital sharing is prevalent, utilizing email, social media, or dedicated recipe platforms. Printable recipe cards, streamlined for kitchen use, remain a thoughtful gesture. Clearly indicate serving sizes and preparation time for convenience.
When sharing family recipes, include anecdotes about their origin and significance. This adds a personal touch and enhances the recipe’s value. Encourage feedback and modifications, fostering a collaborative culinary exchange.
Respect copyright when sharing recipes from published sources; always credit the original author. Be mindful of dietary restrictions or allergies when sharing with others, offering substitutions when appropriate. Ultimately, sharing recipes is about connecting through food and creating joyful experiences.